Hello Hello!
Happy last day of February! Spring is just around the corner! And although I cannot wait for the change in weather, I do have to say I’ll miss winter just a little bit. February is one of my favorite times (NO not because of Valentine’s), but because it my favorite person’s birthday, Kevin!
It’s always cold out during around his birthday, but we make a point to go out and do fun things or have relaxing cuddly or game filled nights together during this month. Everyone is a little sick of winter and snow and cold by this time so we make an attempt to spend time together and an effort to make those times fun!
Well for his birthday this year I decided to surprise him with a little DIY Project! Because nothing says I love you like macaroni art, kidding!
As you guys know, we’ve been moving and cleaning up our apartment in anticipation of the baby. One of the things we did was buy a buffet/credenza for the dining room (room/apartment tour with small changes coming soon). We got this one from Ikea (Regissor), to replace a small bookcase we had in that spot.

This Clint Eastwood poster is pretty old, it used to hang in Kevin’s father’s college dorm room! Which means it has tears, creasing, chipping, but also very precious to my hubby. We’ve talked about getting it framed but since its vintage and an odd size (not standard frame size), it would run us up about $500! We haven’t found anyone who would do a full frame cheaper than that, YET.
(we’re still hoping)
And we’re trying to start a family! So we’re not trying to spend that much money on a custom frame!
Well buying the large buffet kinda made the poster look a little more naked than usual, so I had an idea for dressing it up! Without spending so much $$ on it! And I figured it would make a nice surprise for Kevin 😉


Here’s a few more pics so you can get a better sense
You’ll Need:
4 common board pieces (cut to your desired size)
Medium Grade Sanding Sponge
Sawtooth Picture Frame Hanger (pack of 2)
4 Flat Corner Brace Pieces
Screws (16)
Nails (2)
Drill
Hammer


*It cost me about $20 for supplies (NOT including the drill and hammer)
A little background on supplies; I went with common board because although it’s more pricey than rough cut wood, it has a more finished look. I got 2 pieces 2 1/2 inches wide for $5.50 and Home Depot cuts them to the size you want for free! Also, you should decide how wide you want the wood to be around your poster art print and since it’s basically putting a rectangle together, you will have “inside” pieces, so take that into consideration when measuring.

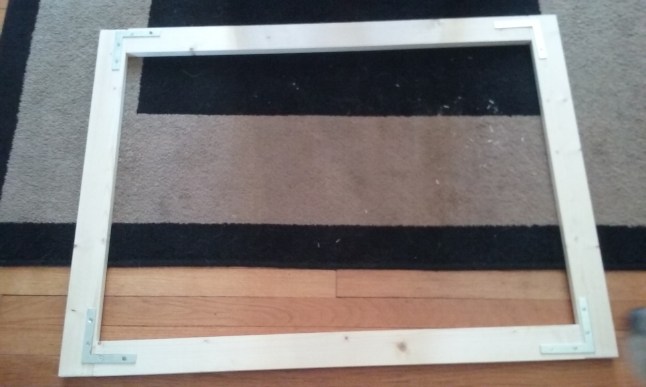
1. Lay out your pieces
You can see the pieces on the top and bottom are on the “inside” of the other two pieces. These are the sides of the frame in my case. Those “inside” pieces are NOT going to be the full length of the poster because I have to consider the other pieces that will make up the rest of the length. I had two 36″ pieces and two 30″ pieces for this poster.
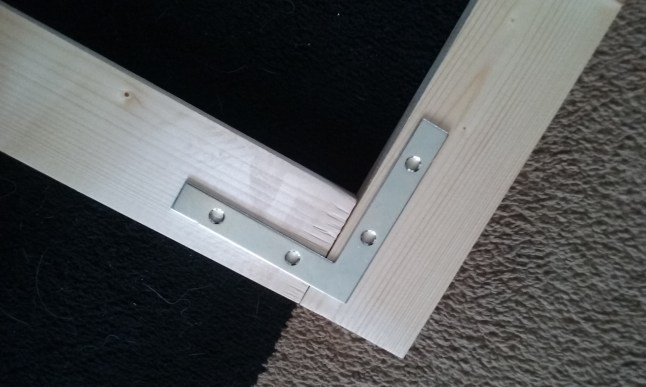
2. Add the Flat corner brackets to each corner. This is how you’ll join the pieces together.
3. Use your drill and screws to secure each corner bracket. Your screws should only be long enough to go into your wood pieces a little less that half way. So get short screws that are not as thick as your wood.
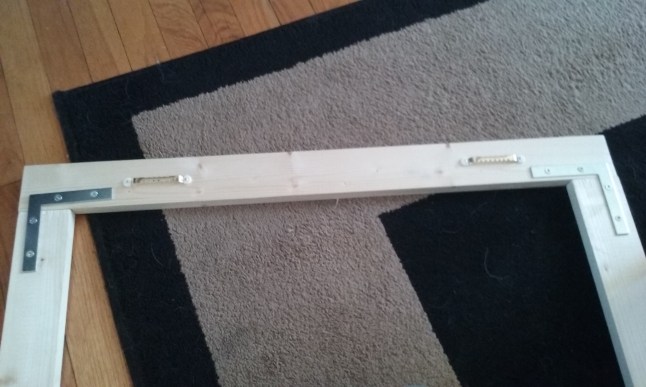
4. Hammer in your Sawtooth Frame Hangers. Depending on how high above the poster or how low you want the frame to hang.
5. Use your Sanding Sponge to lightly sand and rough edges or corners on your frame. I gave it a light overall sand, especially in the seams where the wood pieces met.


6. Hammer in a couple of nails into the wall ABOVE your poster art print. Where the sawtooth hanger will rest. This poster is delicate so I did not want to ruin it. Hanging the nails ABOVE where your poster is on the wall will allow the frame to rest on top and over it.


*The frame lays on TOP and OVER the poster. The poster is NOT attached to the frame in any way. I was not trying to ruin our poster.
If you have an inexpensive poster or something not precious/delicate, you can staple the poster to the frame and make it one complete piece.
You can also stain or paint the frame if you want to give it a more finished look!
I will probably stain the wood frame in the future, just not something I was going to do as a pregnant lady!

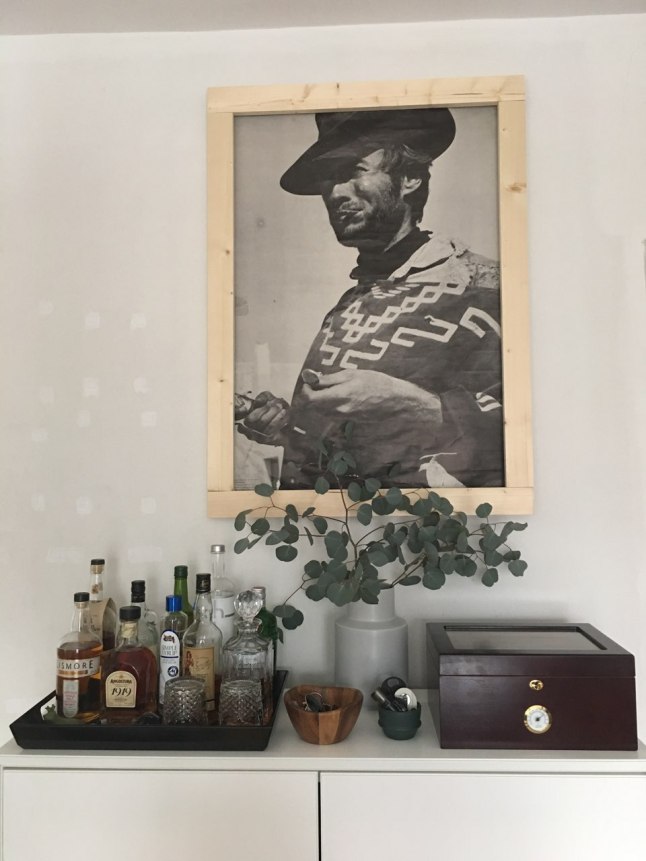
This DIY took me an hour to do! It was fast and pretty cheap!
It was a success and I’m pretty satisfied how this came out, it makes the poster look more finished and the best part is that you can make this for ANY size of poster or art print that you have!
Simple, easy, and budget friendly DIY projects can make a big difference to things in our home!
Love,
B

Clever to protect the fragile poster! Not everyone would think of that… And, your round-leaf eucalyptus look great overlapping the lower part of the frame.
LikeLiked by 1 person